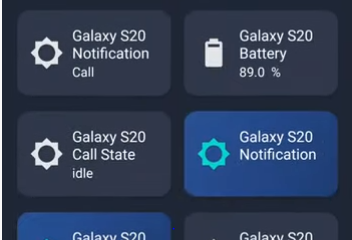
You can use Ariela in combination with Home Assistant in order to receive notifications directly on your Android device. What can you do more is using those notifications to send custom commands back to the server. One cool example: receive notification that someone opened your front door, and using the notification you can start the home protection mode (blinking lights, siren etc).
1. Setup
- Download fcm-android.py from https://github.com/MCrissDev/HANotify
- Copy the fcm-android.py file into your /custom_components/notify/ folder (create it if you don’t already have it) (use this step only if you are using Home Assistant version lower then 0.88)If you are using Home Assistant version 0.88 or newer, Copy the fcm-android.py file into your /custom_components/fcm-android/ and rename the script to notify.py
- In your configuration.yaml file, add the following to initialize the components:
notify:
- name: android
  platform: fcm-android
- Reboot Home Assistant.
- Enter Ariela application, go to settings and enable Firebase notifications
2. Usage
2.1 Sending the notification
The android actionable notifications are set up the same as the html5 notifications. The following parameters can be sent:
title
target
message
data:
  actions
  color
  message_type
  tag
  dismiss
  image
  icon
| Parameter | Required | Description |
|---|---|---|
| message | Required | Body of the notification |
| title | Optional | Title for the notification, default value: Home Assistant |
| target | Optional | Target notification to be delivered to one specific device |
| data | Optional | Extra parameters for the notification |
Parameters for the data section of the notification. Everything here is optional.
| Parameter | Description |
|---|---|
| color | A hex color such as #FF0000, default value is a blue |
| message_type | ‘notification’ or ‘data’, defaults to ‘data’. This is the type of FCM that is sent. Notification has higher priority, but can’t include actions or be dismissed by Home Assistant. |
| tag | Must be an integer. Tag is the ‘id’ of the notifications. Sending a new notification to the same tag will overwrite the current notifcation instead of creating a separate one. |
| dismiss | true or false, requires a tag parameter. If true, the notification will be dismissed. |
| actions | Array of ojects (up to 3) with an ‘action’ and ‘title’. The title will be the button text on the notification, the action is what is sent back in the callback |
| image | A URL of an image to send. The image overwrites the BigTextStyle so longer texts will be truncated. The image will also be smaller if actions are included |
| icon | A URL of an icon to use for the notification. Only on >= SDK 26. Careful to choose icon with tranparent background to follow Android guidelines. |
In order to send a “regular” notification without actions, all you have to do is not include them in the call to the service, such as below.
- service: notify.android
  data:
    message: Anne has arrived home
This will send a simple push notification without any action buttons.
If you want to include some actions, something like this will work:
- service: notify.android
  data:
    message: Anne has arrived home
    data:
      actions:
        - action: open
          title: Open Home Assistant
        - action: open_door
          title: Open door
This will have two buttons, one that says “Open Door” and one that says “Open Home Assistant”. The action for each button (“open” or “open_door” in this example) will be returned in the callback.
2.2 Handling the callback
The callback is pushed to the event bus. It can be accessed via fcm_android_notications.clicked. The “action” of the button that was pressed is included in the event_data. So an automation would looks something like:
- alias: TEST RESPONSE
  trigger:
  - event_data:
      action: open_door
    event_type: fcm_android_notifications.clicked
    platform: event
  condition: []
  action:
  - data:
      entity_id: light.front_door
    service: light.turn_on
3. How it works
When you clicked register on the app, it sends a firebase token back to Home Assistant. That token is saved into the fcm-android-registrations.conf file. This token is what is used to identify what devices to send the notification to. If the notifications involve actions, the token for the device is included in the callback. Before the callback is processed, the token is checked against the fcm-android-registrations.conf file for validity.


